Education Tutorial
Tutorial overview
In this step-by-step guide, you will learn how to create a report as well as how to add key data points to the report that will help your business plan.
Related Resources
Lightcast ™Step 1:
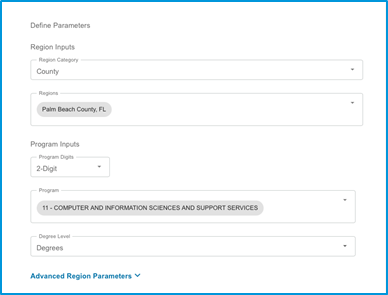
- In the “Region Category” box, choose one from the following selections:
- State
- MSA
- County
- ZIP
Step 2: WITHOUT ADVANCED PARAMETERS

- In the “Regions” box, choose at least one region from the alphabetical list. To reduce the number of options on the list, begin to type in the region you are looking for.
- In the “Program Digits” box, choose your desired program digit level (2-Digit, 4-Digit or 6-Digit).
- In the “Program” box, choose at least one educational program.
- In the “Degree Level” box, choose one from the following selections:
- Associate’s degree
- Award of at least 1 but less than 2 academic years
- Award of at least 2 but less than 4 academic years
- Award of less than 1 academic year
- Bachelor’s degree
- Certificates
- Degrees
- Doctor’s degree
- Master’s degree
- Post-master’s certificate
- Postbaccalaureate certificate
- Total
For example, please refer the image
Step 3: WITH ADVANCED PARAMETERS - Radius from Address
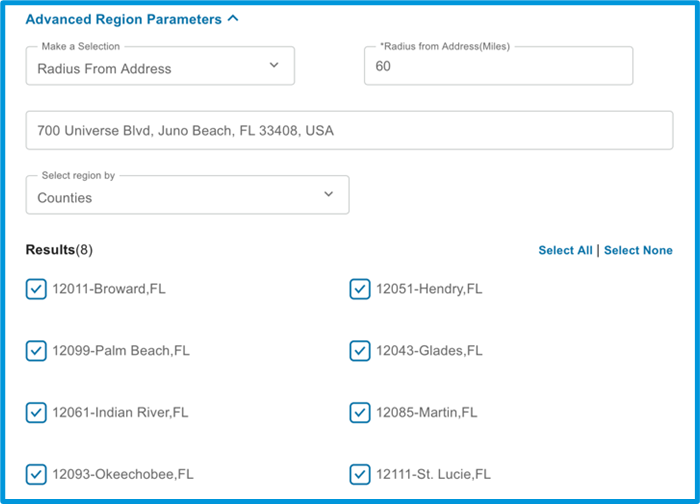
- Under “Advanced Region Parameters,” choose either “Radius from Address” or “Drive Time” from the “Make a Selection” box
- If choosing “Radius from Address”:
- In the “Radius from Address (Miles)” box, enter a value.
- In the “Enter a location” box, begin typing and select a specific location once a list populates.
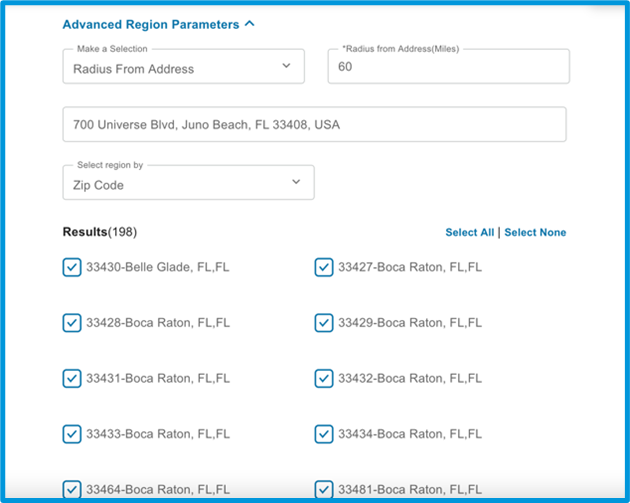
- In the “Select region by” box, choose either “Zip Code” or “Counties.” Select any or all of the resulting options.
- If choosing “Radius from Address”:
For example, please refer the image
Step 3: WITH ADVANCED PARAMETERS – Drive Time
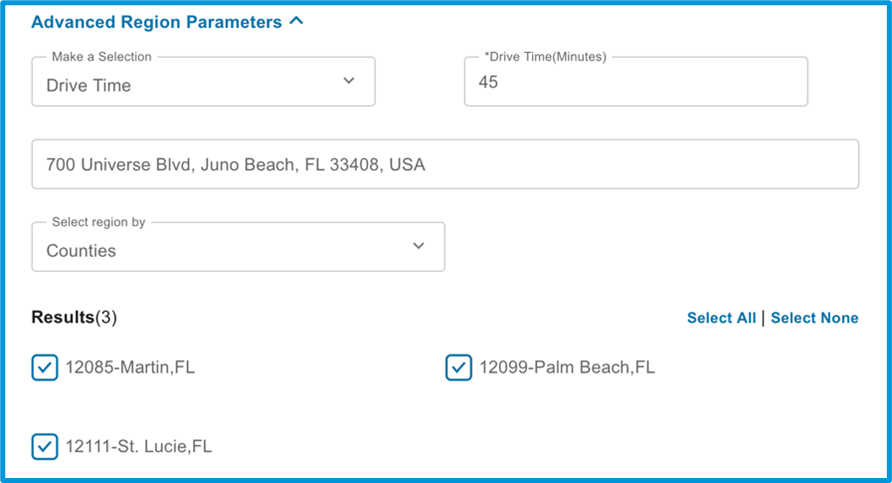
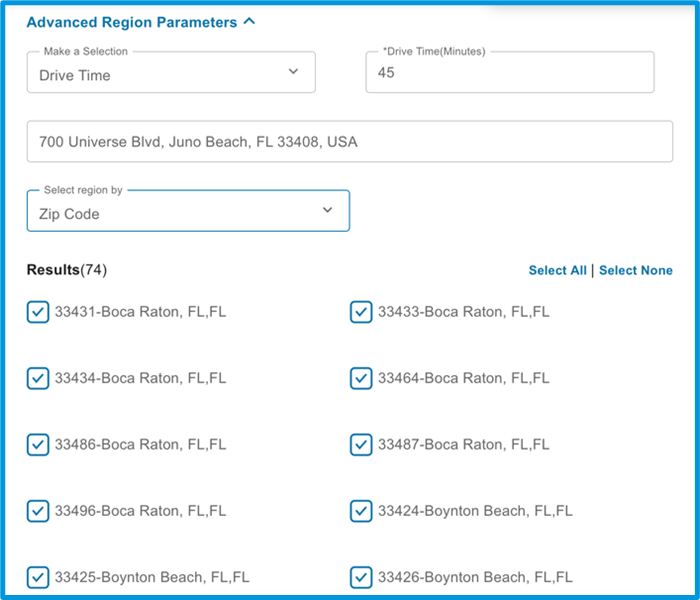
- If choosing “Drive Time”:
- In the “Drive Time (Minutes)” box, enter a value.
- In the “Enter a location” box, begin typing and select a specific location once a list populates.
- In the “Select region by” box, choose either “Zip Code” or “Counties.” Select any or all of the resulting options.
For example, please refer the image
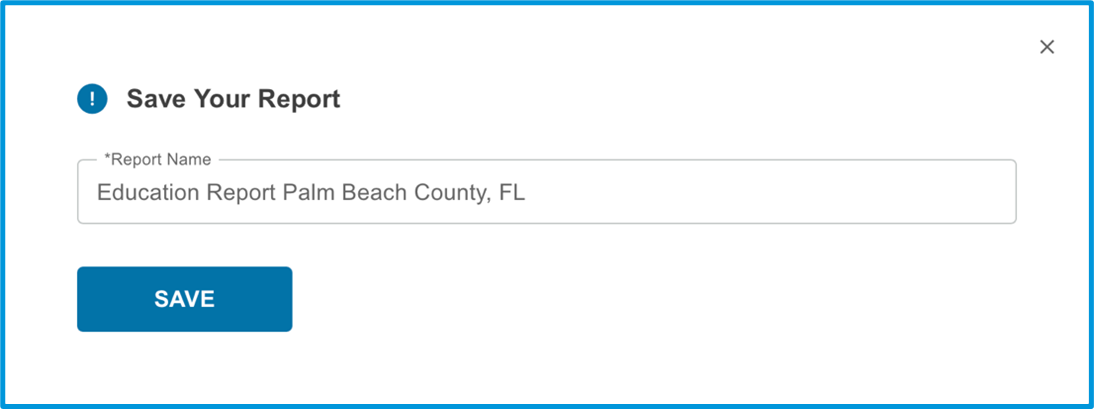
Step 4: Create and Save your Report
- Click the “NEXT” button to create the report. The following widgets will be included in the Education report:
- Program Data by Institution
- Program Completions and Student Demand
- Click the “SAVE” button to save the report. You must name your report in order for it to save.
For example, please refer the image